If you’ve ever purchased something and thought “I’ll never use this again,” remember that you can always repurpose it. For example, a baby gate can make a stellar clothes drying rack! This article shows you how it’s done.

I’ll admit, I never thought there would be any correlation between a baby gate and a clothes drying rack. You never know what a moment of genius (or desperation) can produce.
It turns out that the right kind of gate has good-sized, well-spaced rungs perfectly suited for a wall mounted clothes drying rack.
This is perfect because if you are anything like me, you could use more clothes-drying real estate.
Even though I’m not the one who does the laundry (my wife won’t let me) I can tell we need more drying space. The fact that all our air-dried clothes won’t fit on a single rack really drives the point home.
I am willing to bet that your home could use an extra clothes drying rack as well, especially a space-efficient one like this. If that is the case, then let’s dive in!
This article explains how to re-purpose a baby gate into a fully functional clothes drying rack.
Clothes Drying Rack
One of the best things about being a parent and a creative is re-purposing kid’s stuff into something useful for daily life.
My favorite is when I turned our baby gate into a clothes drying rack!
We initially bought the baby gate to protect our toddlers from tumbling down the stairs. Admittedly, all three of them ended up falling at some point but the gate worked great when it was closed! *nervous laughter*
In any event, we were recently blessed to be able to take it down. That is when my brain went into hyper-what-else-can-I-use-this-for mode.
Using a baby gate as a clothes drying rack has a few advantages:
- The rungs are perfectly sized and spaced for hanging clothes on
- It already comes with wall-mount hardware and instructions
- It is extendable and retractable, making it perfect for a wall-to-ceiling-mounted option
- Mounting it from the wall to the ceiling makes use of overhead space, freeing space below it
While it seems unconventional, it was extremely easy to install and ended up being just as easy to operate.
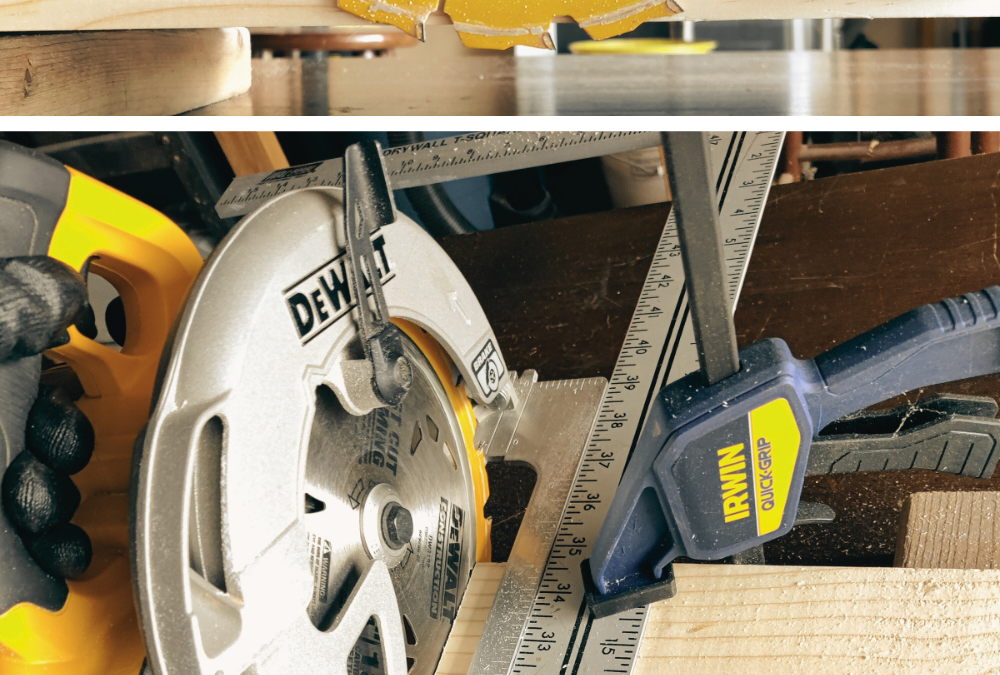
Tools
This is a straightforward installation so you won’t need that many tools. However, some make the job easier and are a great investment for a frequent DIY’er. Here are some options, either way:
Required:


Optional:


Materials
1. Extra Tall and Wide Expandable Baby Gate
We used a Regalo gate like the one below. It worked amazingly for years as a gate so we hope it will do the same as a drying rack.

2. Long-Neck Screw Hook
This is what the gate hangs on to keep it up overhead. We just used one, which worked well but you can use as many as you would like.

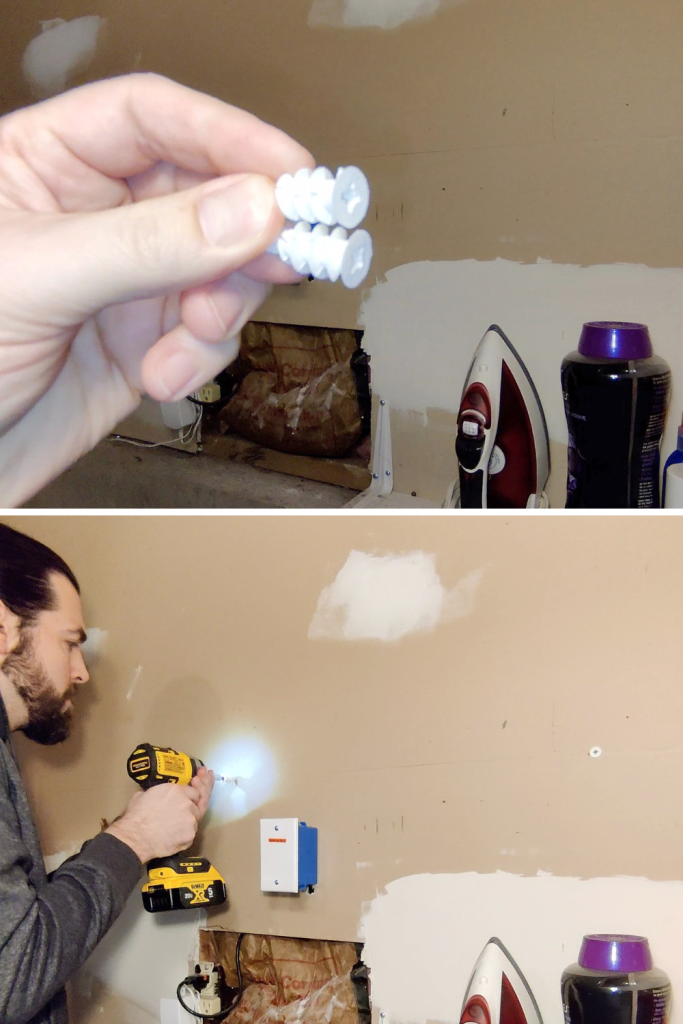
3. Drywall Anchors
At some point, be it this project or the next, you will need some good-quality drywall anchors. I’ve used these EZ Anchor’s for a while and they are a breeze to install/uninstall. They can also hold up to 75 lbs each, so there is no worry of overloading them.

Installation
I was impressed with how fast this project went, especially since we already owned the baby gate.
Conceptually, all you do is attach the gate to the wall horizontally. It will then extend to hang on the screw hook attached to a floor joist or the ceiling.
The hook will hold it overhead until you need to lower it. You hang the gate on the hook by extending it slightly to get around it and then retracting enough to sit on the hook.
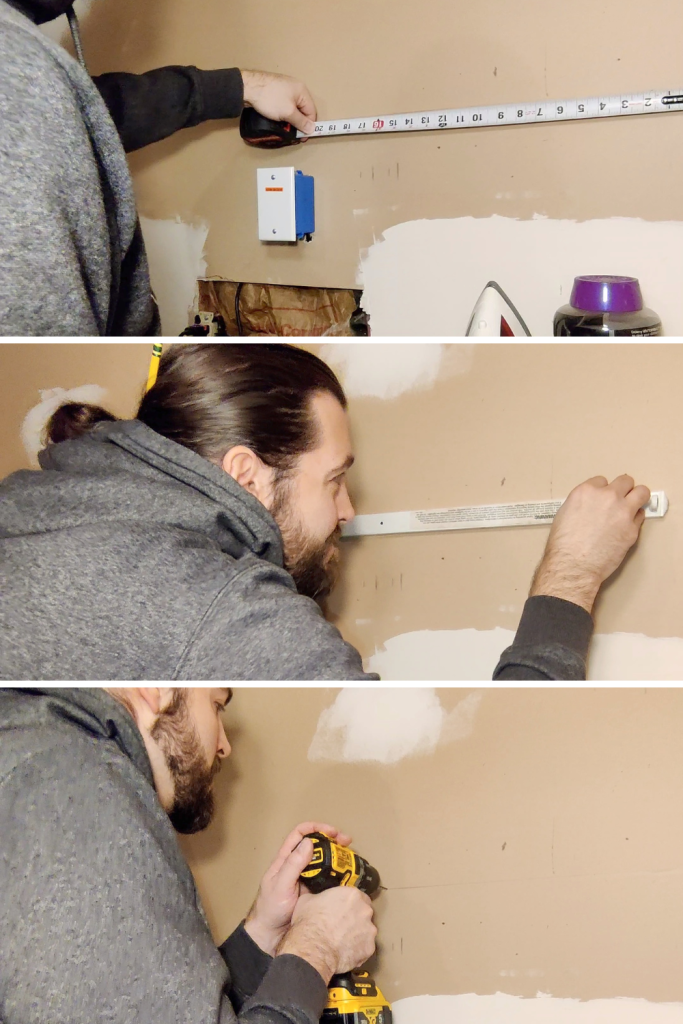
To install the clothes drying rack (aka babe gate), follow these steps:
1. Determine Rack Position
Find where you want to hang the rack and look above and below it to ensure clearance for it to move up and down. Make sure nothing to its left or right would run into it either. Take opening the washing machine door, for example.
2. Determine Rack Angle
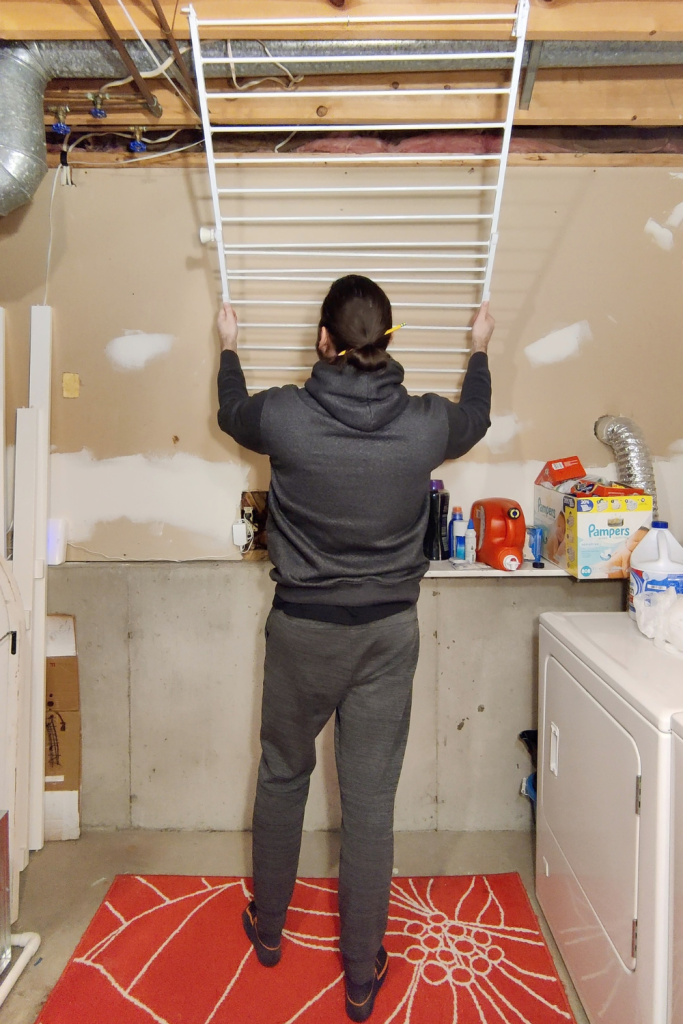
Fully extend the rack then retract it 1-2 inches and hold its position. While holding the rack in position, place the wall-mounted end against the wall.
While holding the wall-mounted end against the wall, angle the rack upwards until it touches the ceiling or floor joists.
With both ends touching, adjust the rack to the desired angle. Hold and move to step 3.
3. Lay Out Screw Hook Position
Using a pencil, mark the ceiling or floor joist where the middle of the last rung touches it.
This will be the approximate location for the screw hook.
![]() NOTE: If installing on a floor joist, install it about 1/4″ up from the bottom of the joist face (in between joists) that is oriented away from the rack. This will allow for more overhead clearance of the rack and more hanging rungs available.
NOTE: If installing on a floor joist, install it about 1/4″ up from the bottom of the joist face (in between joists) that is oriented away from the rack. This will allow for more overhead clearance of the rack and more hanging rungs available.
Take down the rack and set it aside.
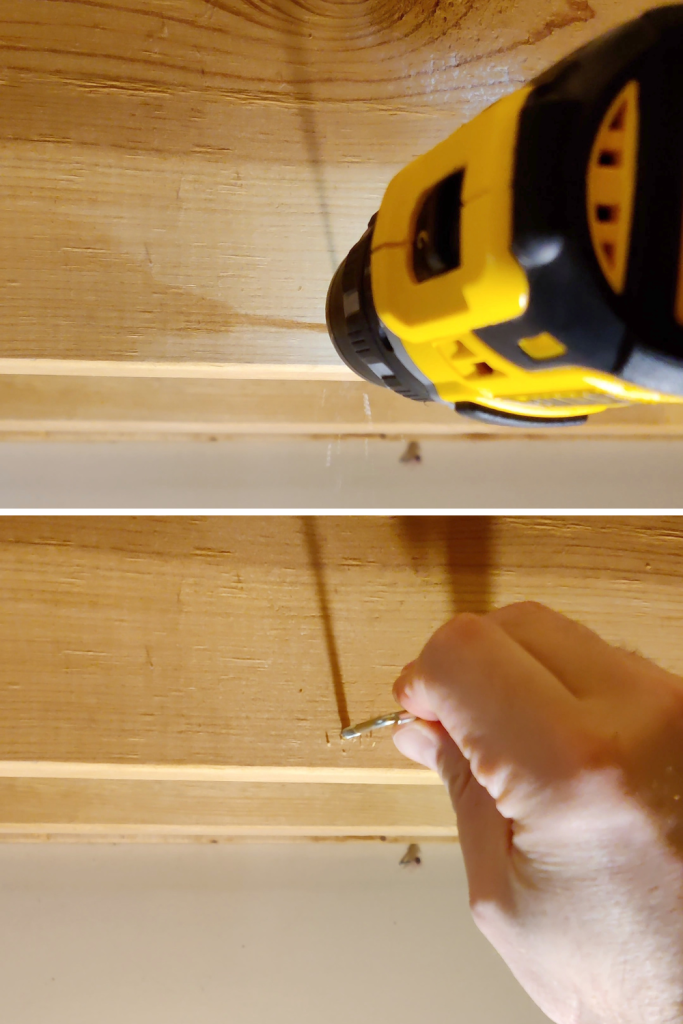
4. Drill Screw Hook Pilot Hole
Select a drill bit that is the same diameter as the shaft of the screw hook minus the threads. If using the suggested screw hook above, select a 1/4″ drill bit. Attach the bit to your drill.
Drill on the pencil mark made in step 2 to a depth equal to the length of the threads on the screw hook. If using the suggested screw hook above, this will be 1 3/8″.
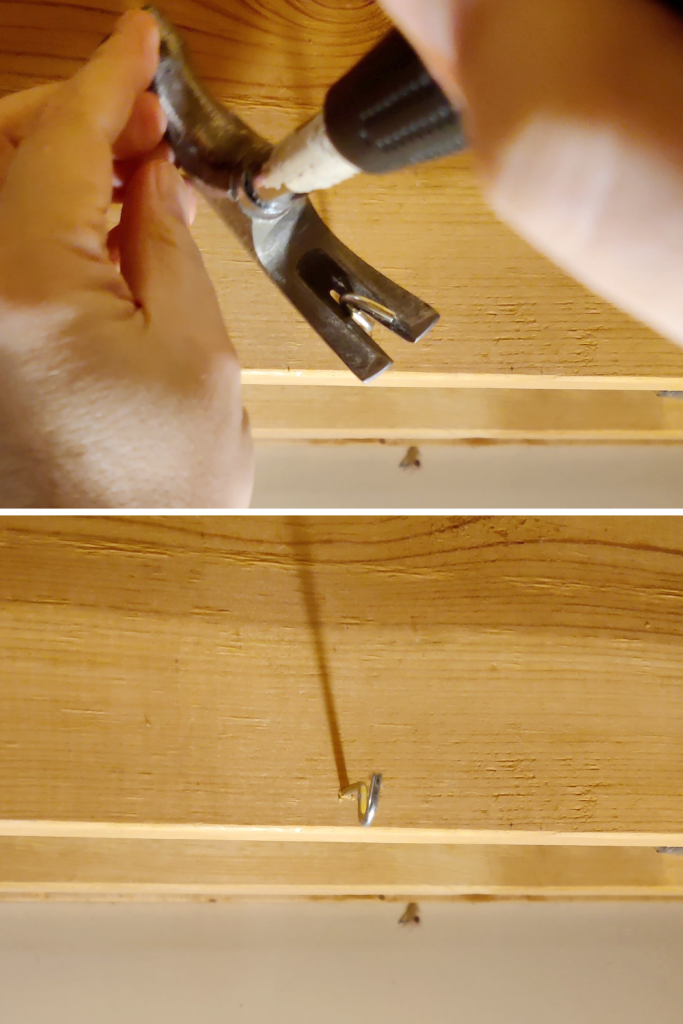
5. Install Screw Hook
Insert the screw hook into the pilot hole and screw it in until all threads are no longer visible.
![]() TIP: Use the claw of a claw hammer to quickly turn the hook if it becomes too difficult to turn with your fingers.
TIP: Use the claw of a claw hammer to quickly turn the hook if it becomes too difficult to turn with your fingers.
Ensure that the hook is oriented with the open side facing up.
6. Lay Out Rack Mount Position
With the gate fully retracted, hang it on the screw hook by the middle of the last rung. Ensure it is hanging by the end of the gate that will not be attached to the wall.
With the gate secured on the screw hook, pull the wall-mounted end to the wall allowing it to expand as needed.
Once the gate touches the wall, move it to the desired angle where the rack is extended to 1-2 inches before its maximum extension.
Hold the position and mark the wall with a pencil where both sides of the rack touch the wall. Take down the rack and set it aside.

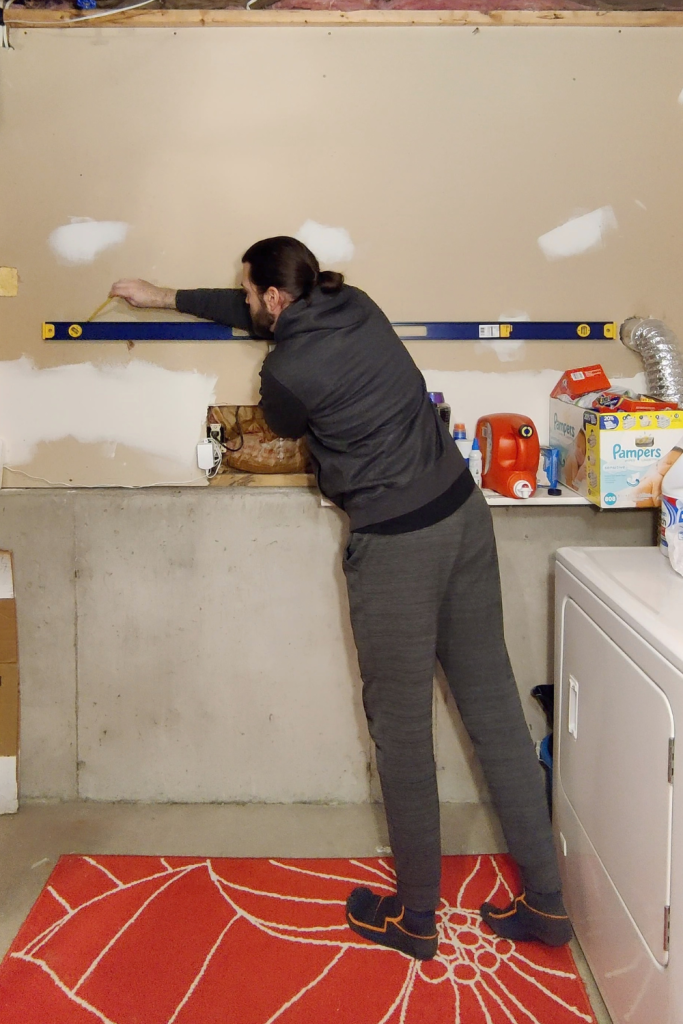
7. Lay Out Rack Mount Level
Use a level to find the level line between the two marks on the wall. Once the level line is found, scribe the line on the wall using the straight edge of the level.
![]() TIP: Use a large (~72″) level to make this part easier.
TIP: Use a large (~72″) level to make this part easier.
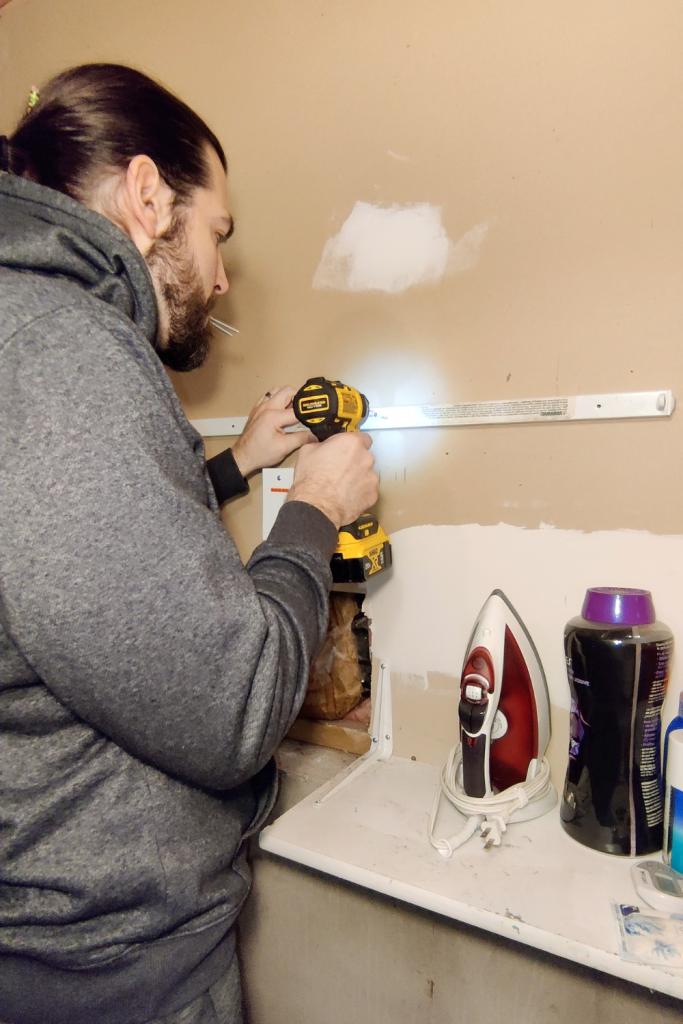
8. Lay Out Wall Stud Positions
Use your preferred method to find a stud somewhere in the horizontal center of the scribed line. Once found, use a pencil to mark the center of the stud on the scribbed line.
Use a tape measure to measure 16″ from the mark just made and make another mark on the scribed line. Do this for the left and right of the first stud mark until all available studs within the scribed line are marked.
9. Drill Rack Mount Pilot Holes
Place the rack mount on the wall horizontally and line up the scribed line to the horizontal center of the mount.
While holding the mount, use one of the included mount screws to make an indent in the wall through each hole in the mount.
Attach the appropriately sized pilot hole bit to the drill. If using the suggested baby gate above, the pilot hole bit size will be 3/32″.
Drill on the indents as far as the bit will go.
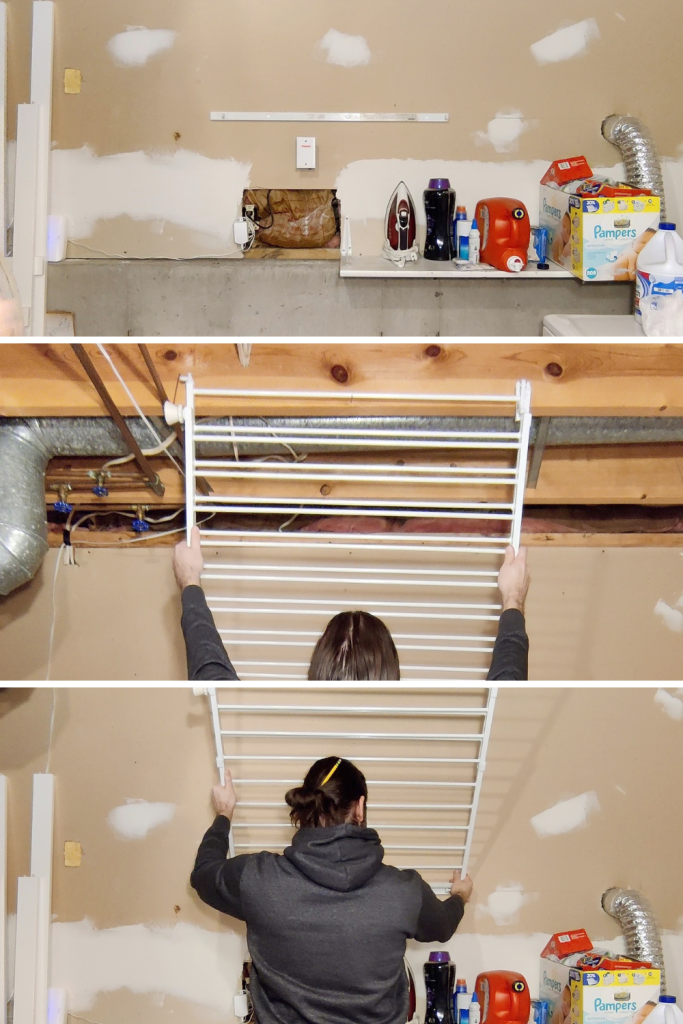
10. Attach Rack Mount To Wall
Hold the rack mount on the wall and match up the mounting holes with the pilot holes/drywall anchors.
Insert included mounting screws into pilot holes/drywall anchors through the mounting holes and tighten by hand.
![]() TIP: Use an impact driver to get the screws in faster. Just don’t screw them in all the way.
TIP: Use an impact driver to get the screws in faster. Just don’t screw them in all the way.
Use a hand screwdriver to finish tightening the mounting screws.
11. Attach Rungs to Rack Mount
Finally, connect the wall-mounted end of the rack to the now-secured rack mount on the wall. The rack should be able to move up and down freely.
Ensure that the rack can extend and retract enough to hang on the installed screw hook.
Conclusion
This was a fun and quick way to add another clothes drying rack to the laundry room. One that is much needed.
The ability to move the rack up, down, in, and out, gives it a ton of flexibility that other drying racks don’t have.
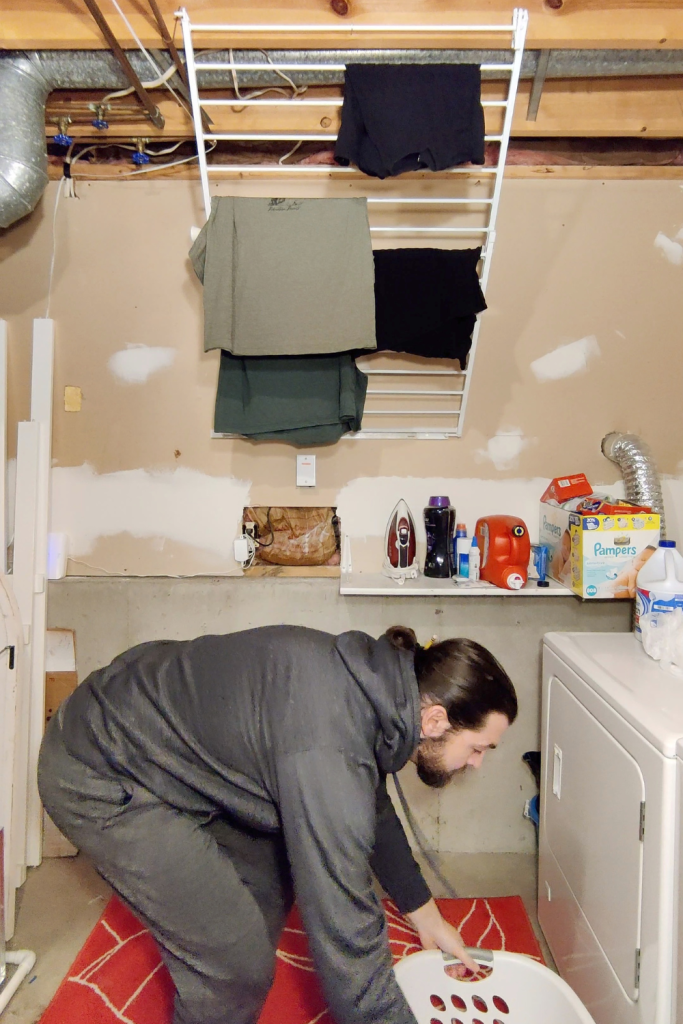
In addition, because it can hang from the ceiling, we can save even more space and still access the drying clothes easily.
Overall, I am confident this clothes drying rack will be a great addition to your laundry space and ensure your home will work better.
Is it your turn to make this clothes drying rack?
Comment below!


0 Comments