If you’ve ever wanted to start making wooden DIY projects but lack a shop full of tools, I have good news! You only need one saw to make basic cuts and start you on your DIY journey. This article will teach you how to cut wood using only a circular saw!
As an Amazon Associate, I earn from qualifying purchases.
Before you start tackling DIY home improvement projects, you will likely need to learn how to cut wood in various ways at some point.
To do that, you’ll need a saw. Okay, so which one?
There are multiple kinds of saws and hundreds of brands to choose from. Some saws are basic, some are specialty saws. Some are electric, some are manual.
It can be maddening trying to research which one you need just so you can start cutting wood!
…take a breath, babe. I’ve got you.
Luckily, I’ve gone through this same scenario and am happy to reveal that a single-saw solution exists! (for most projects, anyway)
So let’s slip on those sexy safety glasses and learn how to cut wood with only one saw!
This article explains how to cut wood with a circular saw for basic DIY projects.
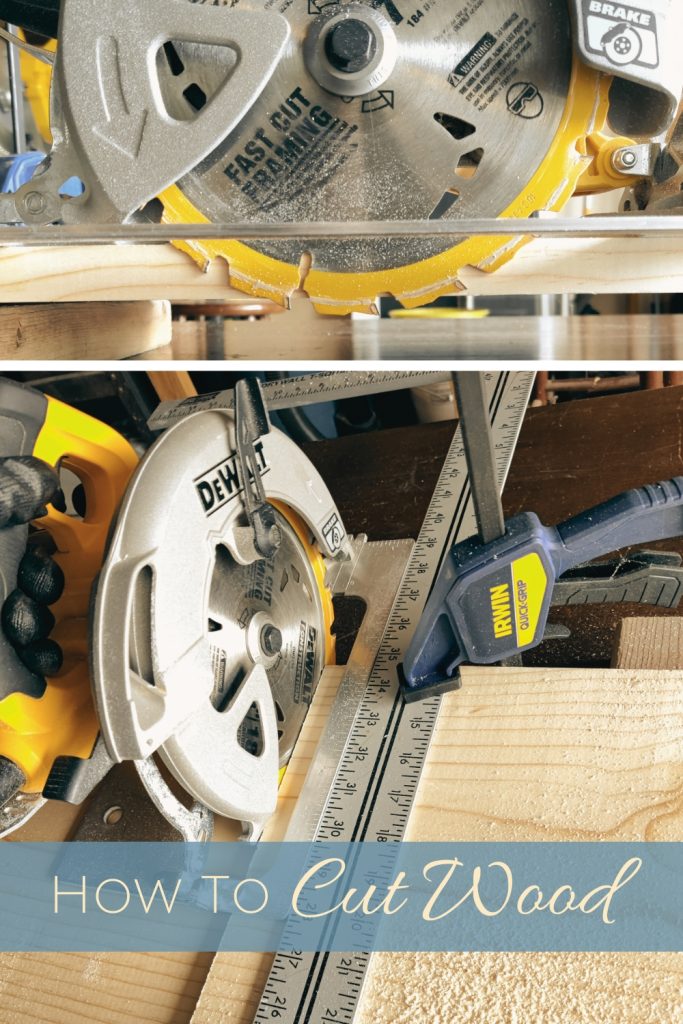
How To Cut Wood
How To Use A Circular Saw
Of all the wood-cutting saws I’ve used, I’ve found that the circular saw is the most user-friendly and least intimidating when first learning how to cut wood.
Even though it’s a basic tool, it is versatile as well. You can make almost any cut with it if you know how.
We’ll cover the details on how to cut later on, but first, let’s learn about the tool we are about to use.
Safety
A big part of learning how to cut wood is learning how to do it safely.
A blood-stained DIY project, donning an eye patch, and missing fingers are not the results I want you to have.
Wear Safety Glasses
Physics lesson: cutting wood equates to throwing tiny, wooden slivers everywhere at high speeds. So if your eyes are in the path of one, you can actually lose your sight for good.

IMHO, that makes it worth looking like a dork and wearing safety glasses while you cut wood.
If you must, spend some money on a pair that makes you feel good about wearing them.
Avoid The Cut Path
The second thing you should know about how to cut wood safely is to stay out of the way of the saw blade.
One of the best things about a circular saw concerning safety is how it is operated.
You move the saw through the piece instead of moving the piece through the saw. This allows you to stay safely behind the path of the saw throughout the entire cut.
Point #1 here is recognizing the path of the saw and keeping your members out of it. This includes feet, knees, hair, etc.
It sounds obvious, and it is, but for some reason obvious things resonate better when they are spoken out loud.
Clamp The Wood
To know how to cut wood is to know how to clamp wood.
If the piece you are cutting isn’t clamped to something, it is free to wabble, shake, and even bind on the saw blade.
Essentially, you open up your piece to be moved by the saw which is likely to result in injury. No bueno.
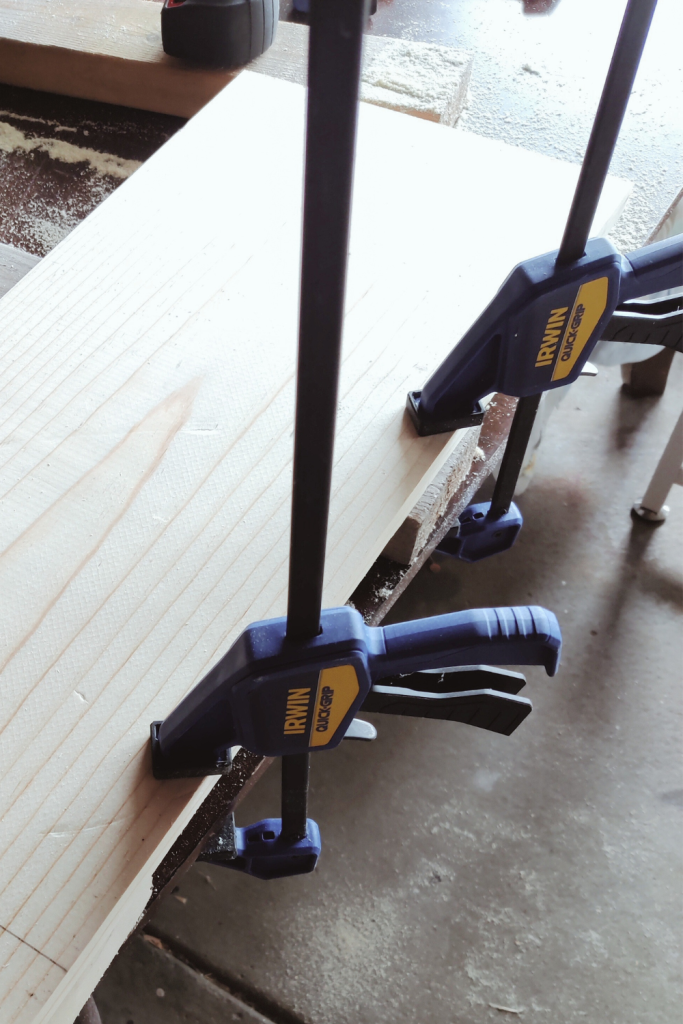
In addition, you won’t have a straight cut, so please clamp your cut pieces.
There are many sizes and styles of clamps out there and you can get them pretty cheap. If you don’t have any, start by purchasing a set of small clamps.
You can expand your collection into larger clamps from there.
Features
There are only a handful of features on a basic circular saw and more expensive ones may have more. However, these features should be universal, no matter the make or model.
You’ll need them to make basic cuts for your DIY projects and successfully know how to cut wood.
Blade Guard
Arguably, the circular saw’s biggest safety feature is the blade guard. And rightfully so, we want to learn how to cut wood, not how to cut limbs.
The blade guard is exactly as it sounds, a guard around the blade that protects you and your meaty bits from becoming burger.
It is a half-tube-like piece of metal or plastic bent into a crescent shape that follows the curve of the saw blade.
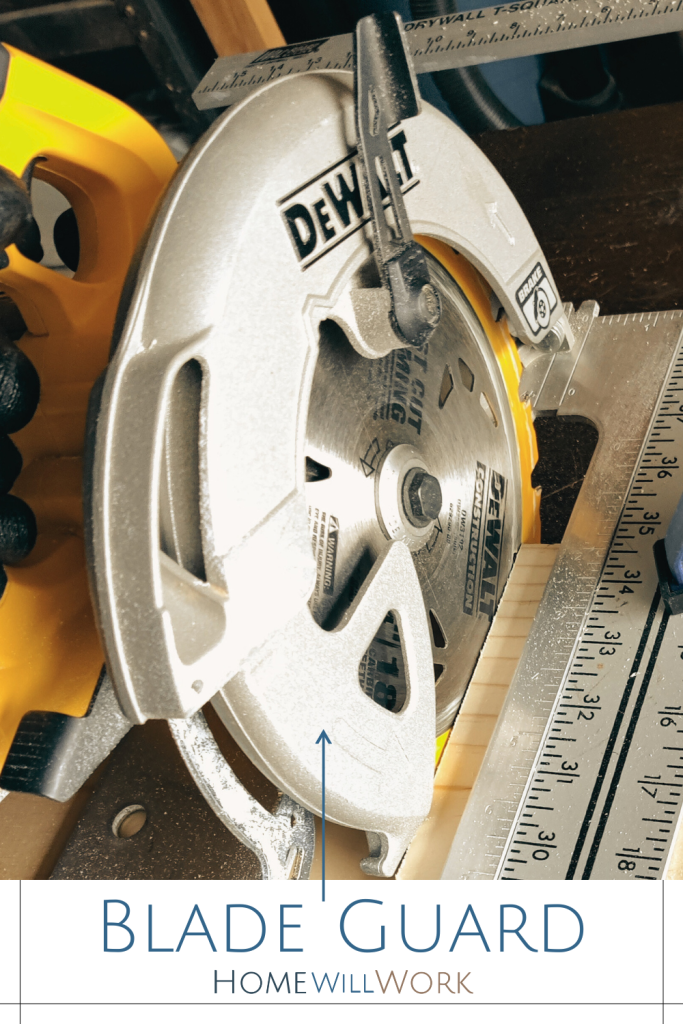
It’s attached to a spring mechanism. This mechanism allows the guard to be pushed out of the way so the blade can cut.
After the cut, the mechanism immediately retracts the blade guard back into place around the saw blade.
Optionally, some blade guards have a handle on it that allows the operator to manually disengage the blade guard.
While this can be helpful in some instances, use caution and go slow any time the blade guard is not guarding the blade.
Cut Depth Adjustment
Most circular saws allow you to adjust how deep of a cut you can make. This is useful for cutting pieces of different thicknesses and making more advanced cuts like dados (we’ll learn about those later).
Normally, adjustment is done by moving the base plate that the saw blade sticks out of closer to or farther away from the saw.
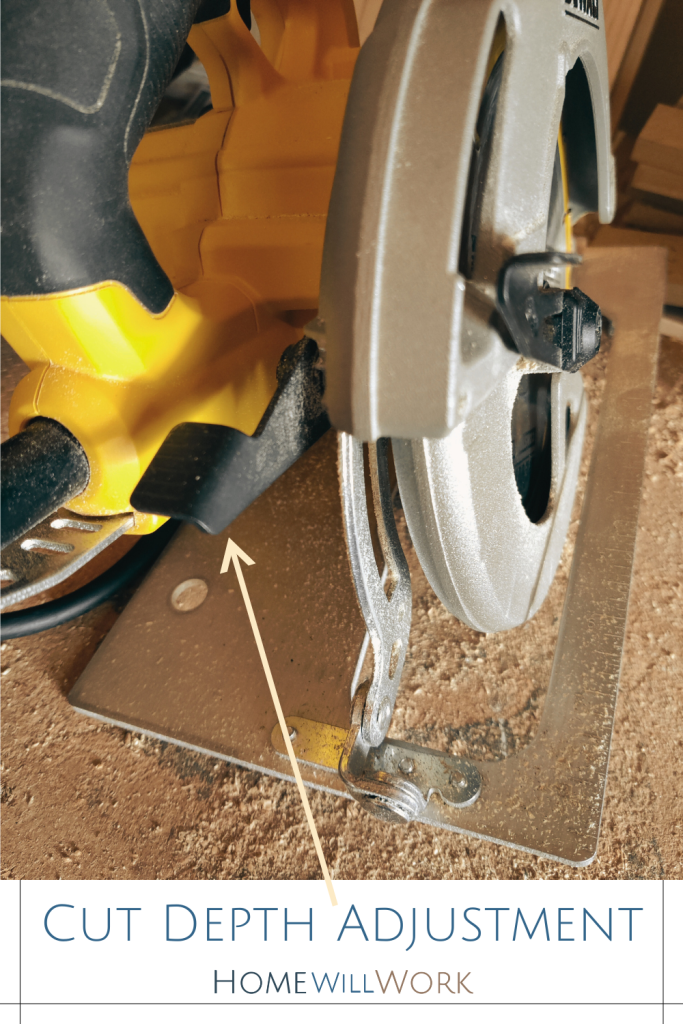
There should be a locking mechanism on the saw that locks in the height of the base plate.
The location and style of the lock varies from model to model so consult the user manual of your saw to find it.
Angle Adjustment
Similar to the depth adjustment lock, a circular saw should also have an angle adjustment lock.
Loosening the angle adjustment lock allows the base plate to tilt so the saw blade is angled relative to it.
Adjusting the angle of the blade allows you to make angled cuts like miters and bevels (we’ll learn about those later, too).

Again, models vary in location and style of the lock. Read the user manual of your saw for operating instructions.
How To Cut Straight
A basic but vital skill to acquire when learning how to cut wood is cutting a straight line. Unless you are explicitly cutting curves, you’ll need some way to cut straight.
Here are some strait-cutting methods you can try. The best method depends on the cut requirements, your budget, and your skill level.
Scribe & Free-hand
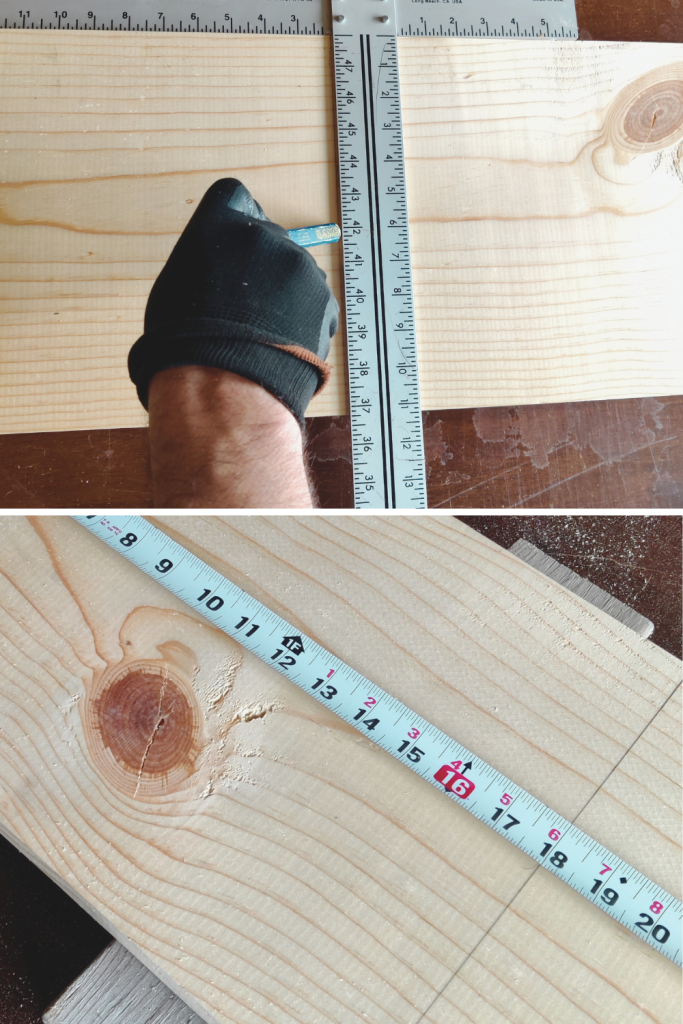
The first option is straightforward and cheap. You’ll need a pencil, a square, and a straight-edge of some kind.
The concept is simple, you measure & mark where your cut needs to be. Then use a square and/or straight edge to scribe a line on the mark spanning the full width of the piece.
There are a couple of different options available in terms of squares. For smaller pieces, you can use a speed square or combination square.
For larger pieces, you have two options. You can use one of the previously mentioned squares on either side of the piece, make a mark, and then connect the marks with a straight edge.
Alternatively, you can use a T-Square to square and scribe the whole piece at once.
Once your line is scribed, clamp the piece and free-hand cut along the line.
This technique takes some practice to perfect, so you may want to use another method if you are a beginner.
Once you know more about how to cut wood with a circular saw, feel free to start perfecting this craft.
I highly suggest you practice on scrap pieces or low-quality projects so you aren’t disappointed with the results early on.
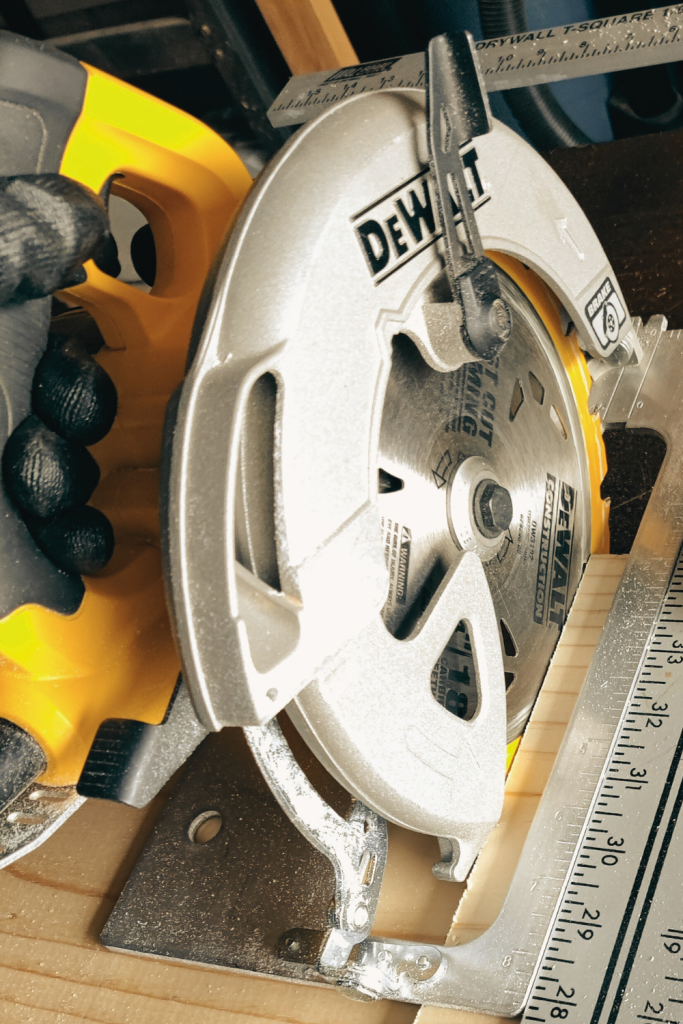
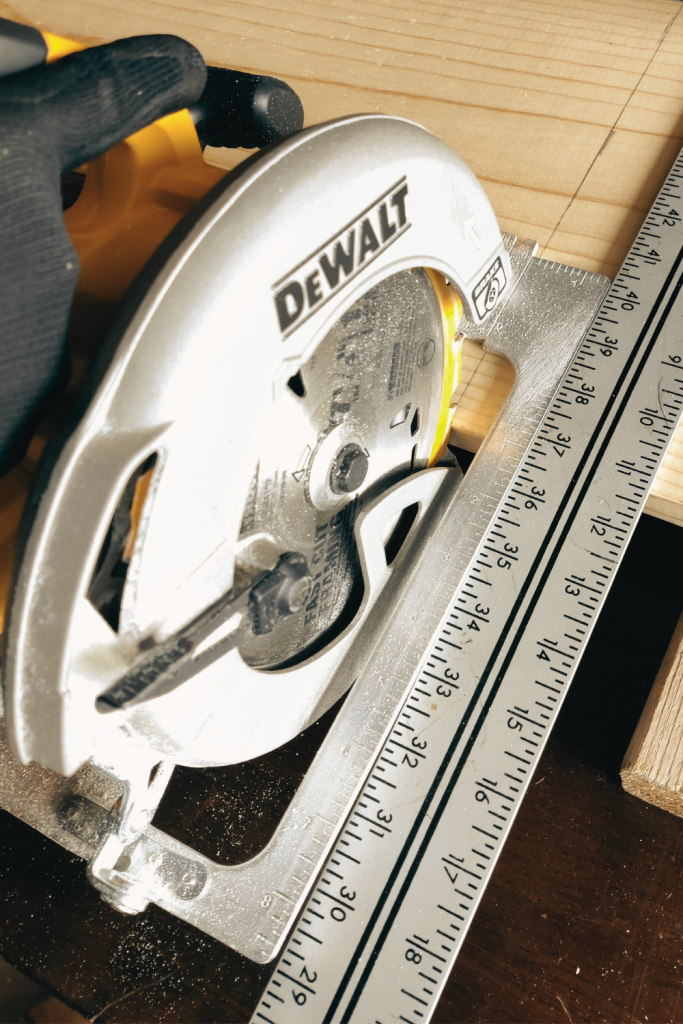
Use A Straight Edge Guide
The next method is one that I have used for a while. It may not be sexy but it’s versatile, affordable, and easy to get.
While you can use anything with a straight edge as a guide, I have found that using a T-Square is best for the job.
A T-Square combines the function of a square and a straight edge into 1 tool that is large enough to be used on various sizes of lumber.
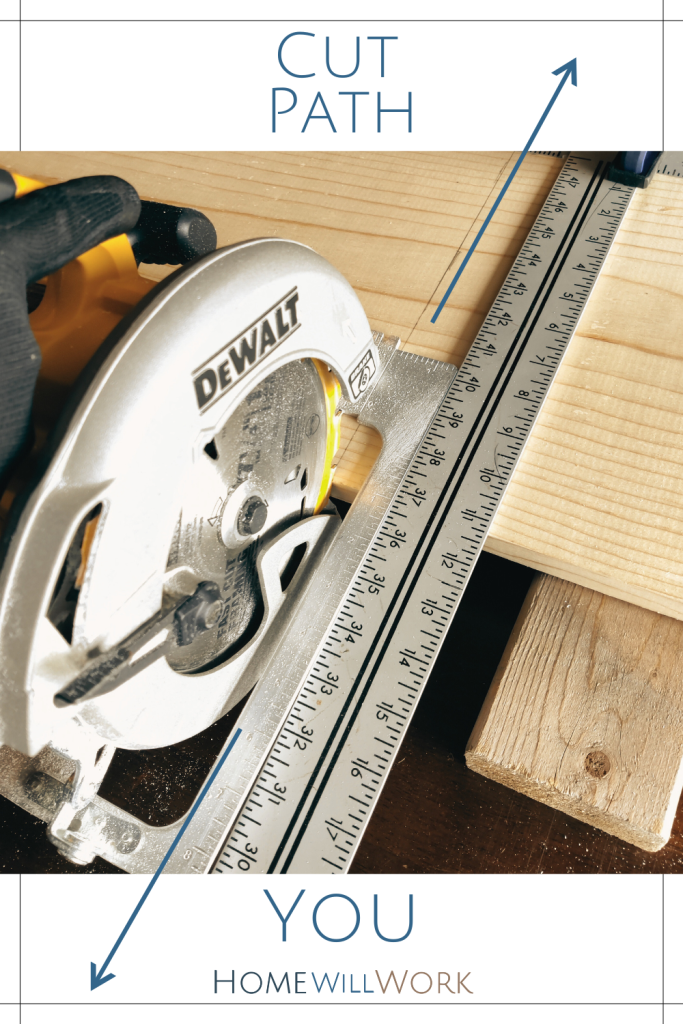
Unlike scribing a line as we did in the previous method, we will use the T-square to guide our saw as we cut.

However, if we clamped the T-square down right on the cut mark, as we did before, the saw blade would not be lined up with the cut mark.
To fix this, unplug/remove the battery from your saw and measure from the blade to the outside edge of the base plate.
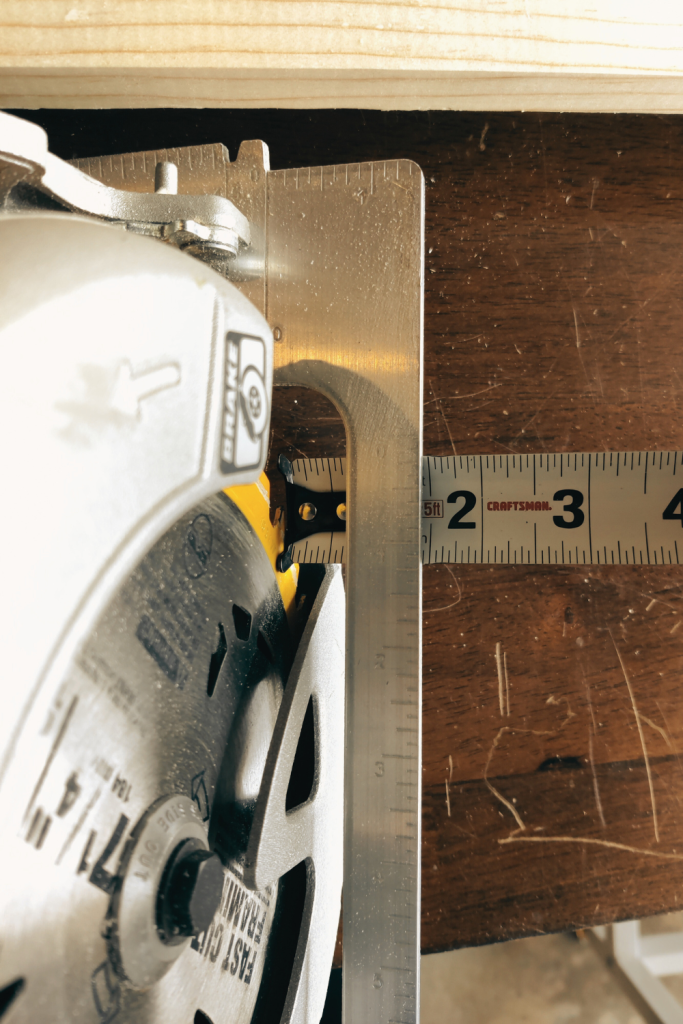
Add 1/8″ to that measurement. Once done, you can add that measurement to every cut mark and clamp the T-square down on it.
This will ensure your saw blade cuts right on the cut mark every time!
Use A Specialty Guide
If the last method involved too much measuring, this method should make you much happier.
This saw guide by Kreg was designed specifically for circular saws to cut straight on pieces up to 50″ long.
It eliminates the need to measure the blade-to-plate-edge distance of your circular saw and add it to every cut.
That is a lot of time and memory saved when you have multiple pieces to cut.
The downside is that it’s more expensive than the other options. So unless you have experience and are committed to DIY’ing often, I would try out one of the previous methods, first.
How To Make Cuts
So far, we’ve covered basic methods of how to cut wood with a circular saw and specific tools. Now let’s focus on some different types of cuts we can make with those methods.
Making Crosscuts
A crosscut is probably the most common type of cut made. The term, “crosscut” describes the direction the blade is cutting relative to the wood grain.
For example, if you have a standard 2 x 4 board it will have lines in it called the “grain”. Generally, the grain will run in the same direction as the length of the board.
If you were to cut that board in half, the saw blade would CUT aCROSS the grain of the wood. Thus, the term “crosscut” was coined.
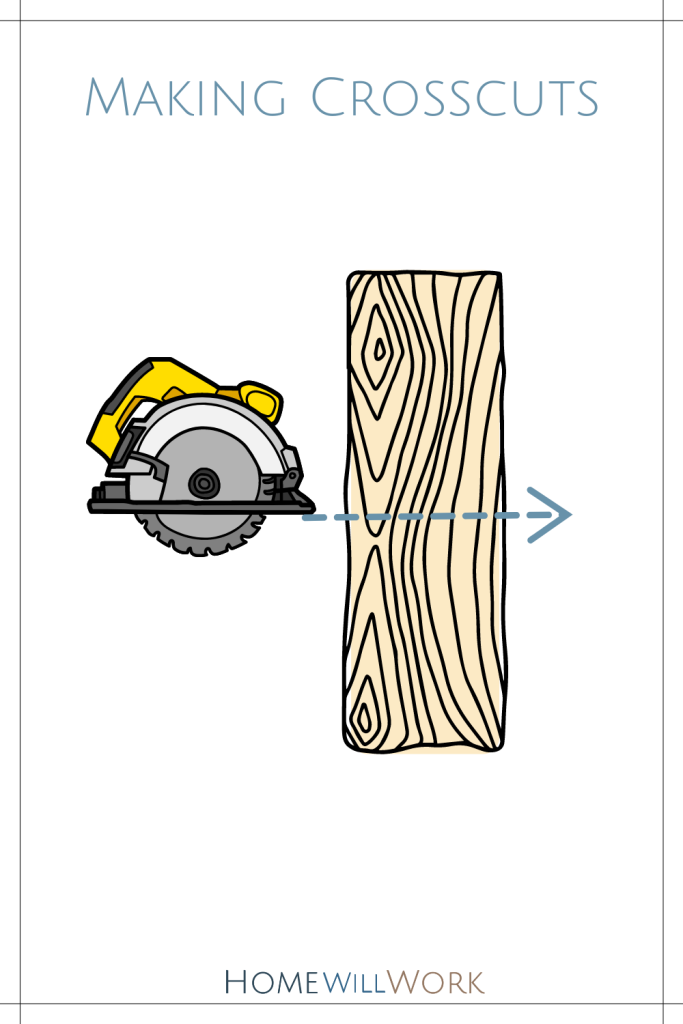
Typically a miter saw is used to quickly and accurately make the crosscuts. However, you can still make crosscuts with a circular saw using one of the three methods above.
This is especially helpful for large-width boards that are too wide for a miter saw to cut, like the boards in these bed storage drawers.
Making Rip Cuts
Rip cuts are parallel to crosscuts. Instead of cutting across the grain, you are cutting along the grain or with the grain.
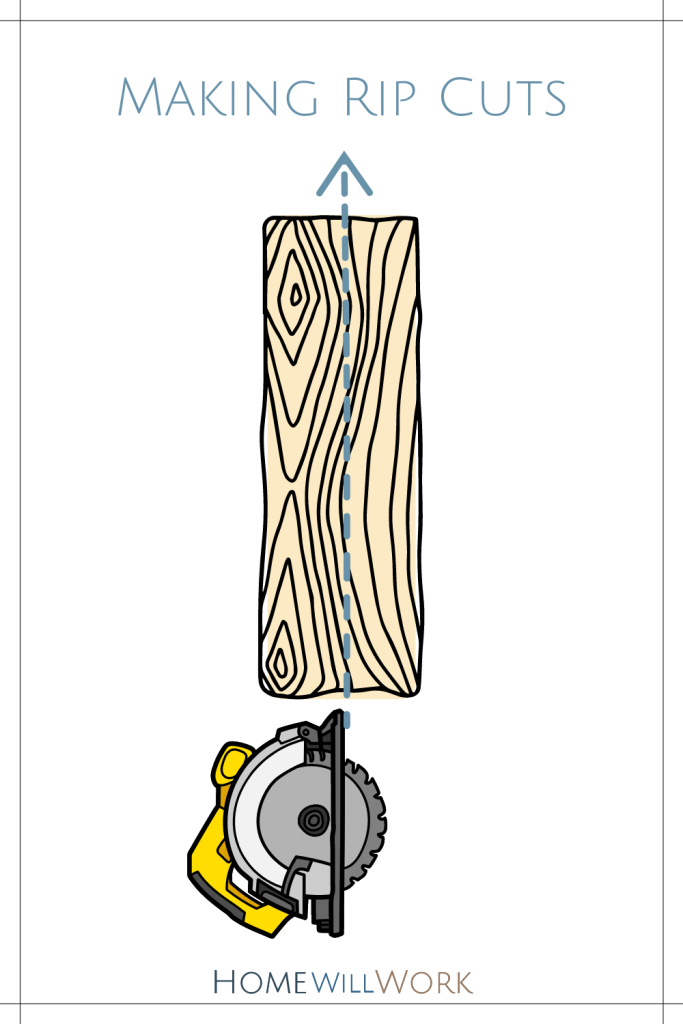
These cuts are less common because most boards are already ripped down to a usable size when purchased.
The exception is sheet goods like plywood, MDF, or OSB. These massive sheets are typically sized at 4′ x 8′ to give as much material coverage as possible.
You most likely need to rip those pieces down at some point.
Of course, these sheet goods no longer have a true grain due to how they are made so the concept of rip vs crosscut doesn’t really apply to them.
Making Dado Cuts
The next two cut types are more advanced methods of how to cut wood. The first, a dado, is the easiest of the two.
A dado is simply a groove in the wood. It is a track that is usually made to allow another piece of wood to slide freely inside it and still be supported.
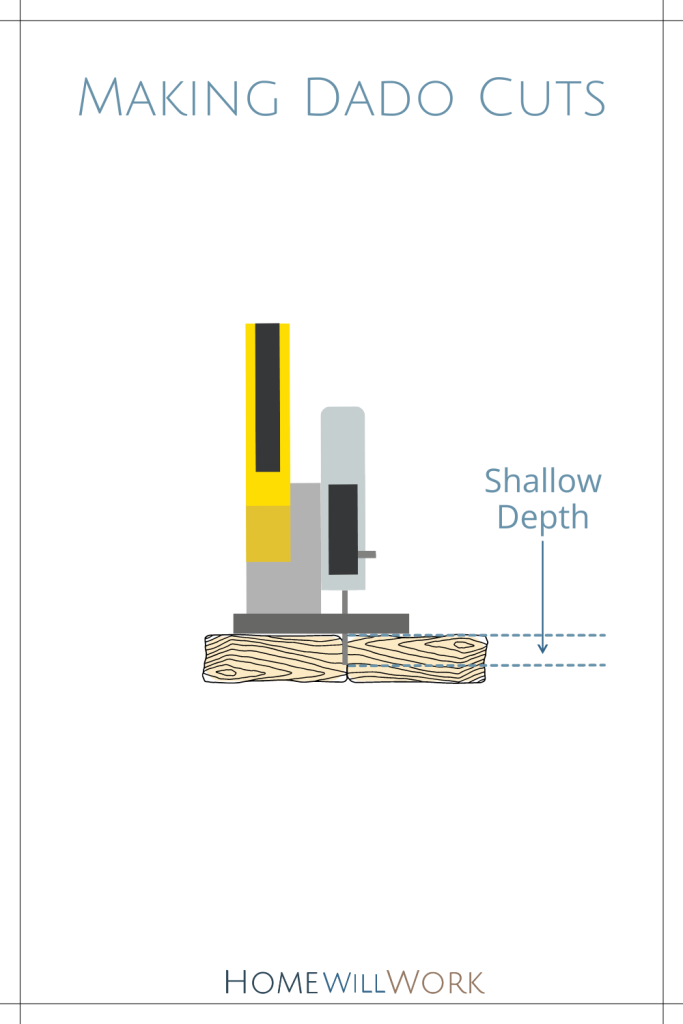
Dados are often used for drawer bottoms, cabinet backs, and other applications because they offer support and stability to a thin board that wouldn’t have much otherwise.
You can make dados with your circular saw by adjusting the depth of cut feature on your saw.
This will shorten the depth that your saw blade will cut so it only cuts a track in the wood instead of cutting fully through it.
However, unless you have a special dado blade installed, you’ll have to make multiple passes with the saw to get the dado to the desired width.
Making Miter & Bevel Cuts
Miters and bevels are two sides of the same coin. They are both angled cuts but run differently relative to the board.
A Miter cut is what you typically see on door and window trim. The cut is made at an angle (usually 45 degrees) across the face of the board.

This allows the angled pieces to connect with the face of the trim (the wider part) presented, achieving a nice, decorative aesthetic.
To cut a miter with a circular saw, you will need to find the angle you want to cut using a speed square. Then you can use one of the methods above to cut.
A bevel is similar to a miter but differs in its orientation. It cuts at an angle across the edge of the board (the thin part) instead of the face (the wide part).

Bevels are used to make boxes, similar to how mitered trim makes a box around a door or window. They also add shape and dimension to a piece for aesthetic purposes.
To cut a bevel with a circular saw, set the angle adjustment on the saw to the desired angle of the bevel. Then use one of the methods above to make the cut.
You can also combine a miter and bevel cut to make a compound miter. This is the most complicated of the cuts mentioned and is most easily done with a compound miter saw.
However, if you are careful and skilled you can still do it with only your circular saw.
Conclusion
Learning how to cut wood for DIY projects can be super exciting, as long as you aren’t overwhelmed.
So rather than taking hours to research all the different saws out there, grab a circular saw and start DIY’ing right away!
You can make most of the cuts you’ll need with it and you won’t need to spend a fortune on saws.
Once you have some experience you can upgrade your tools over time and become a DIY pro, making your home work better and better!
What Will You Build After You Learn How To Cut Wood?
Let us know in the comments below!


0 Comments